
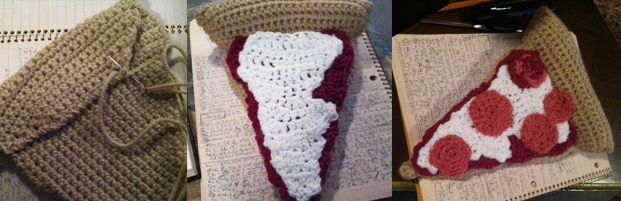
I crocheted these amazing donuts from a Lion Brand Yarn free pattern a few months ago. And since I’ve been kind of in a food kick. My friend Laura requested a pizza slice. Said she’d frame it and hang it on her wall if I made one for her. So I searched and I searched, to no avail, I couldn’t find a pizza slice pattern anywhere (at least not for free) and then I figured, let me make some sketches and figure out how best to build a pizza slice from scratch, no pattern. Let’s make a pattern!
 Notes:
CH = Chain
ST = stitch
SL = Slip Stitch
SC = Single Crochet
SCDEC = Single Crochet Decrease
HDC = Half Double Crochet
DC = Double Crochet
R = Round/Row
I did all this with an H/8-5.00mm hook
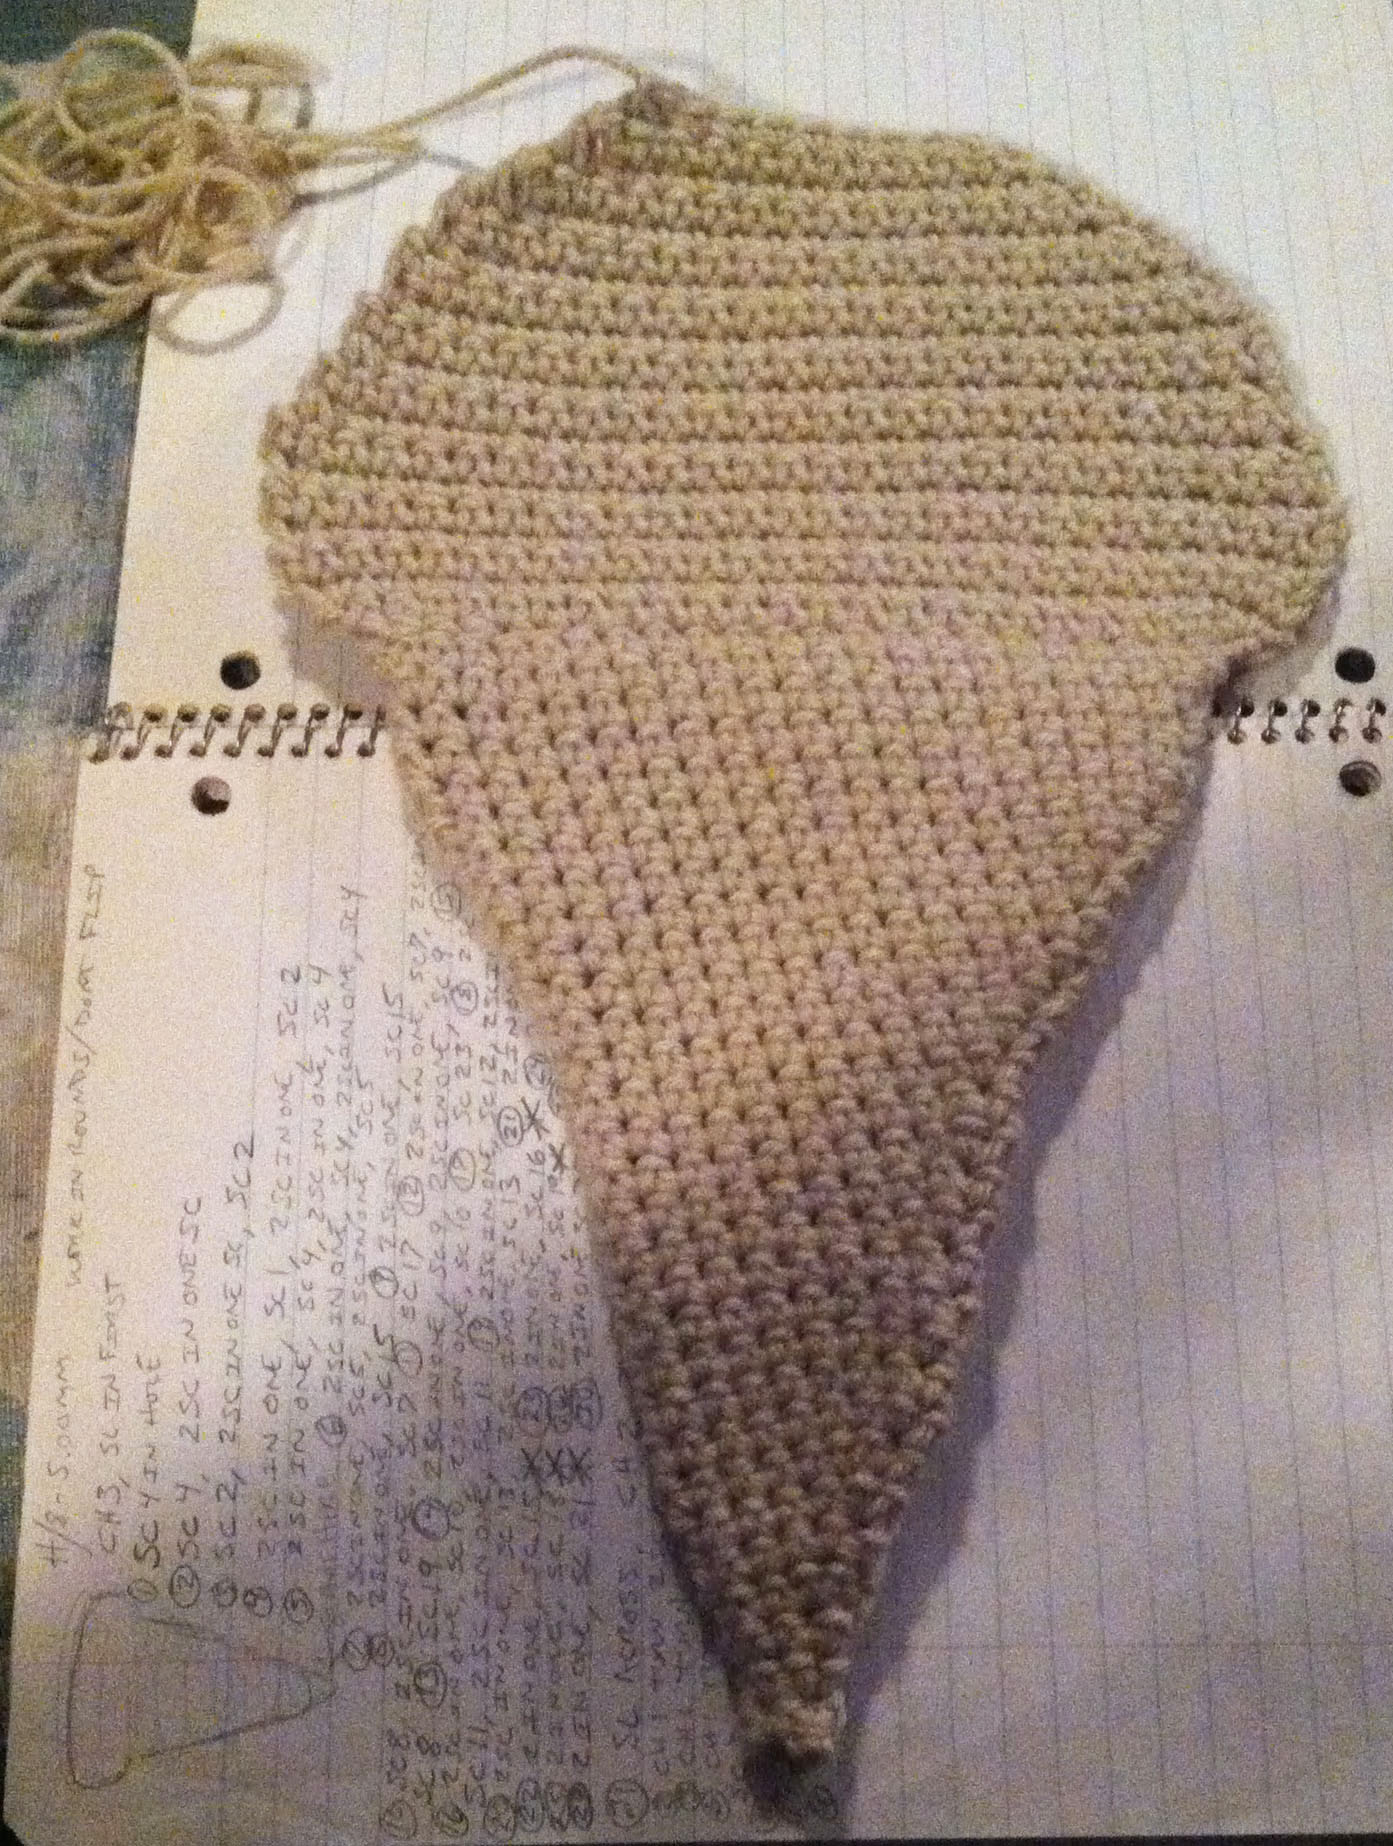
BOTTOM CRUST
Work in Rounds, do not turn.
You start at smallest point of crust and work up to make a double sided triangle (if you pulled it open, it’s a cone) as you work the rounds keep it flat at the “2 SC in one SC”.
CH 3, SL in first CH to make tiny circle.
Round 1: SC 4 times in center of circle. – 4STs
R2: SC 3 in each SC, 2 SC in last SC. – 5STs
R3: SC 2, 2 SC in one SC, 2 SC. – 6STs
R4: 2 SC in one SC, SC 1, 2 SC in one, SC 2. – 7STs
 R5: 2 SC in one SC, SC 2, 2 SC in one, SC 3. – 9STs
R6: 2 SC in one SC, SC 3, 2 SC in one SC, SC 4. – 11STs
R7: 2 SC in one SC, SC 4, 2 SC in one SC, SC 5. – 13STs
R8: 2 SC in one SC, SC 5, 2 SC in one SC, SC 6. – 15STs
R9: 2 SC in one SC, SC 6, 2 SC in one SC, SC 7. – 17STs
R10: 2 SC in one SC, SC 7, 2 SC in one SC, SC 8. – 19STs
R11: SC 19. – 19STs
R12: 2 SC in one SC, SC 8, 2 SC in one SC, SC 9. – 21STs
R13: SC 21. – 21STs
R14: 2 SC in one SC, SC 9, 2 SC in one SC, SC 10. – 23STs
R15: SC 23. – 23STs
R16: 2 SC in one SC, SC 10, 2 SC in one SC, SC 11. – 25STs
 R17: SC 25. – 25STs
R18: 2 SC in one SC, SC 11, 2 SC in one SC, SC 12. – 27STs
R19: SC 27. – 27STs
R20: 2 SC in one SC, SC 12, 2 SC in one SC, SC 13. – 29STs
R21: SC 29. – 29STs
R22: 2 SC in one SC, SC 13, 2 SC in one SC, SC 14. – 31STs
R23: SC 31. – 31STs
R24: 2 SC in one SC, SC 14, 2 SC in one SC, SC 15. – 33STs
R25: SC 33. – 33STs
R26: 2 SC in one SC, SC 15, 2 SC in one SC, SC 16. – 35STs
R27: SC 35. – 35STs
R28: 2 SC in one SC, SC 16, 2 SC in one SC, SC 17. – 37STs
R29: SC 37. – 37STs
R30: 2 SC in one SC, SC 17, 2 SC in one SC, SC 18. – 39STs
R31: SC 39. – 39STs
R32: 2 SC in one SC, SC 18, 2 SC in one SC, SC 19. – 41STs
R33: SC 41. – 41STs
R32: 2 SC in one SC, SC 19, 2 SC in one SC, SC 20. – 43STs
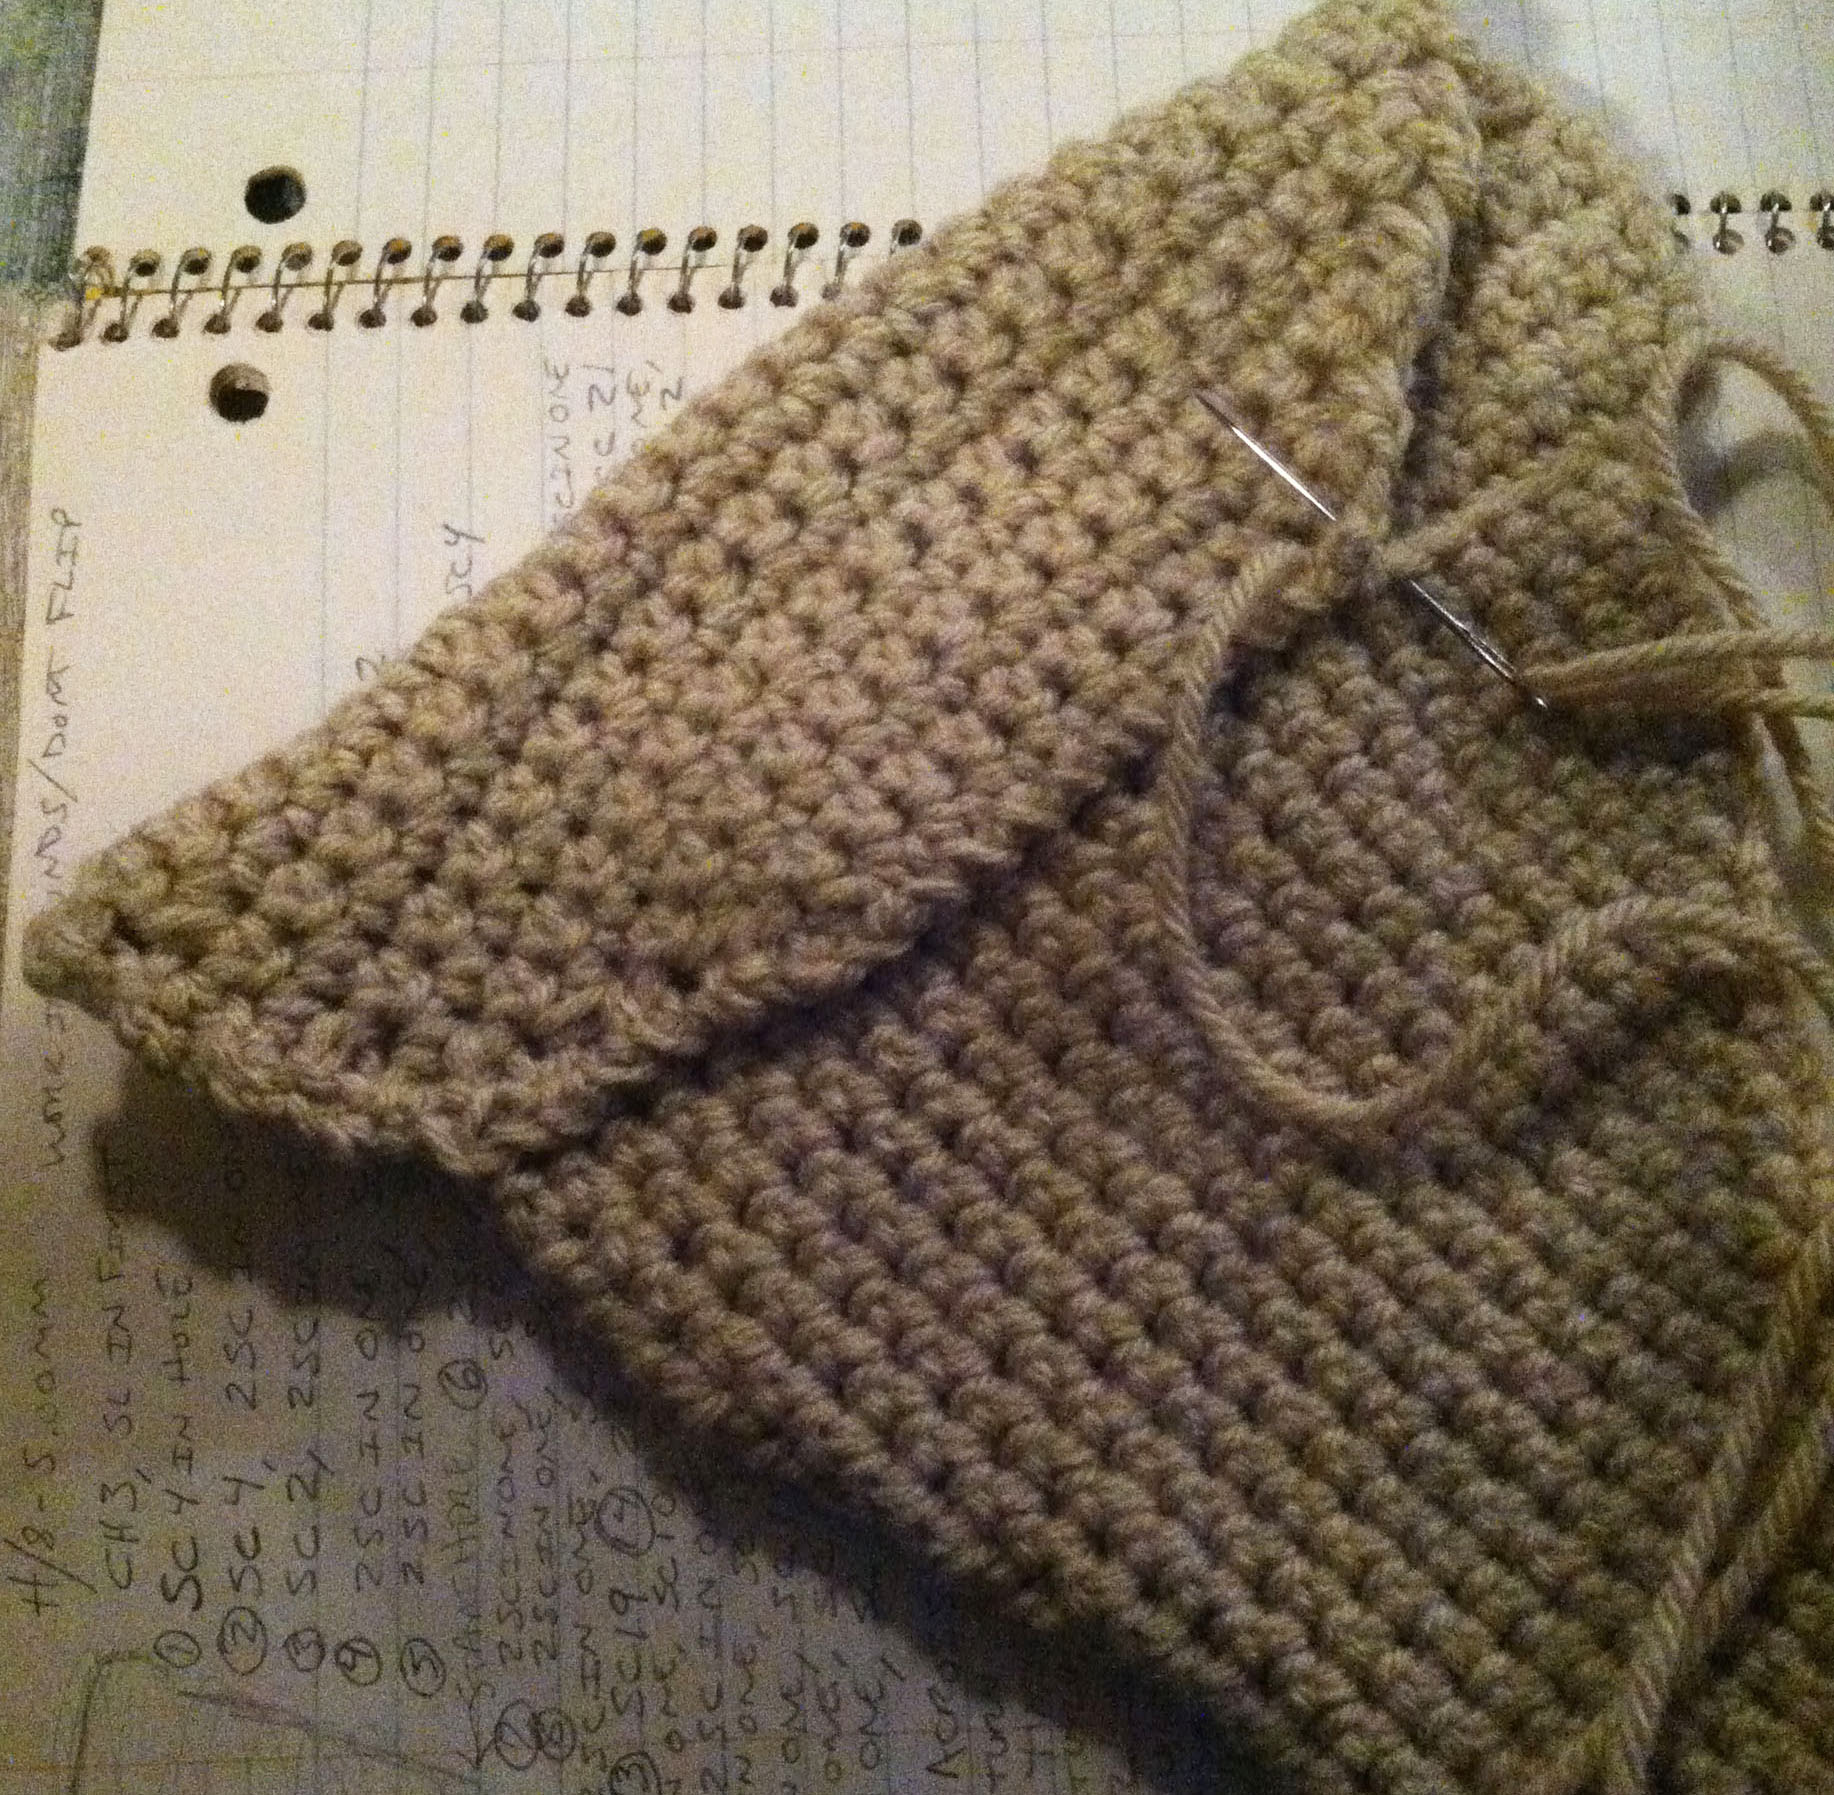
R33: SL 41 times to close cone together but DO NOT fasten off!
 TOP CRUST
You work from the slip stitched bottom crust and you do turn this time.
Row 1: CH 2, turn. (this will hang off the side of the bottom crust)
R2: SC across CH2 and 40 SL, 2 SC in last SL, CH 1 for turning. – 44STs
R3: 2 SC in one SC, SC 42, 2 SC in one SC, CH 1 for turning. – 46STs
R4: 2 SC in one SC, SC 44, 2 SC in one SC, CH 1 for turning. – 48STs
R5: 2 SC in one SC, SC 46, 2 SC in one SC, CH 1 for turning. – 50STs
R6: 2 SC in one SC, SC 48, 2 SC in one SC, CH 1 for turning. – 52STs
R7: 2 SC in one SC, SC 50, 2 SC in one SC, CH 1 for turning. – 54STs
R8, R9 & R10: SC 54 across, CH 1 for turning. – 54STs
R9: SCDEC in first 2 SC, SC 50, SCDEC in last 2 SC. – 52STs
R10: SCDEC in first 2 SC, SC 48, SCDEC in last 2 SC. – 50STs
R11: SCDEC in first 2 SC, SC 46, SCDEC in last 2 SC. – 48STs
R12: SCDEC in first 2 SC, SC 44, SCDEC in last 2 SC. – 46STs
R13: SCDEC in first 2 SC, SC 42, SCDEC in last 2 SC. – 44STs
R14: SCDEC in first 2 SC, SC 40, SCDEC in last 2 SC. – 42STs
R15: SCDEC in first 2 SC, SC 38, SCDEC in last 2 SC. – 40STs
R16: SCDEC in first 2 SC, SC 36, SCDEC in last 2 SC. – 38STs
R17: SCDEC in first 2 SC, SC 34, SCDEC in last 2 SC. – 36STs
R18: SCDEC in first 2 SC, SC 32, SCDEC in last 2 SC. – 34STs
R19: SCDEC in first 2 SC, SC 30, SCDEC in last 2 SC. – 32STs
R20: SCDEC in first 2 SC, SC 28, SCDEC in last 2 SC. – 30STs
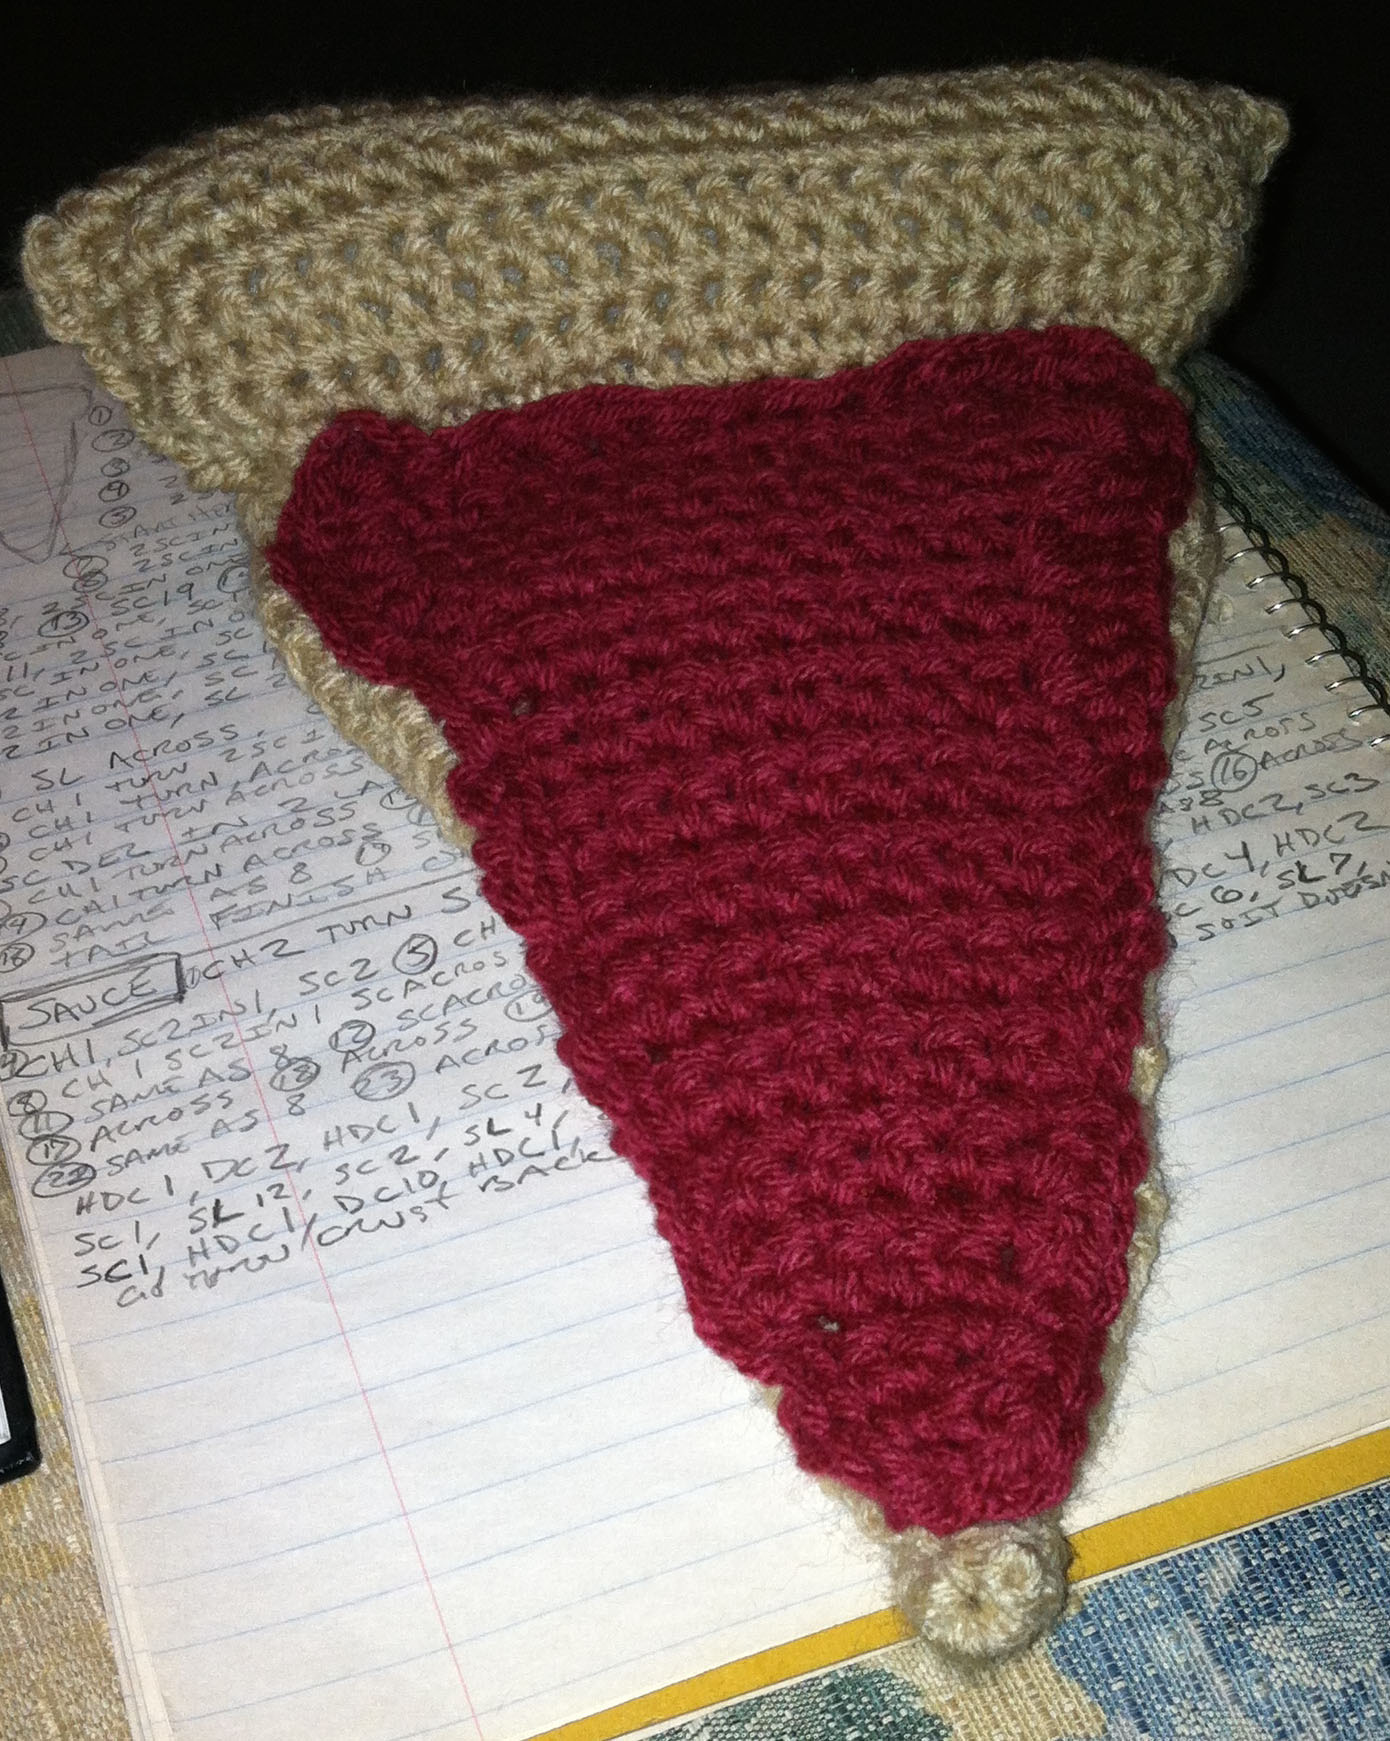 SAUCE
SAUCE
You start at smallest point and work up, then around the edges. Make sure of your gauge, this piece should fit within the top area of your bottom crust, only overlapping the top crust slightly.
Row 1: CH 2, turn, SC in second CH, CH 1 for turning. – 1ST
R2: 2 SC in one SC, CH 1 for turning. – 2STs
R3: SC, 2 SC in one SC, CH 1 for turning. – 3STs
R4: 2 SC in one SC, SC 2, CH 1 for turning. – 4STs
R5: 2 SC in one SC, SC 3, CH 1 for turning. – 5STs
R6 & R7: SC 5, CH 1 for turning. – 5STs
R8: 2 SC in one SC, SC 3, 2 SC in one SC, CH 1 for turning. – 7STs
R9 & R10: SC 7, CH 1 for turning. – 7STs
R11: 2 SC in one SC, SC 5, 2 SC in one SC, CH 1 for turning. – 9STs
R12 – R20: SC 9, CH 1 for turning. – 9STs
R21: 2 SC in one SC, SC 7, 2 SC in one SC, CH 1 for turning. – 11STs
R22: 2 SC in one SC, SC 9, 2 SC in one SC, CH 1 for turning. – 13STs
R23 & R24: SC 13, CH 1 for turning. – 13STs
R25: CH 1 extra, DC 2, HDC 2, SC 3, HDC 1, DC 2, HDC 1, SC 2, CH 1 turn and crochet down side of piece. – 13STs
R26 down 1st side: SC 1, HDC 1, DC 4, HDC 2, SC 1, SL 12, SC 2, SL 4, SC2. – 27STs
R27 up 2nd side: SC 6, SL 7, SC 1, HDC 1, DC 10, HDC 1, SC 3, end with SL. – 28STs
Cut with really long tail so you can now sew this piece using it’s tail to the crust in the appropriate place.
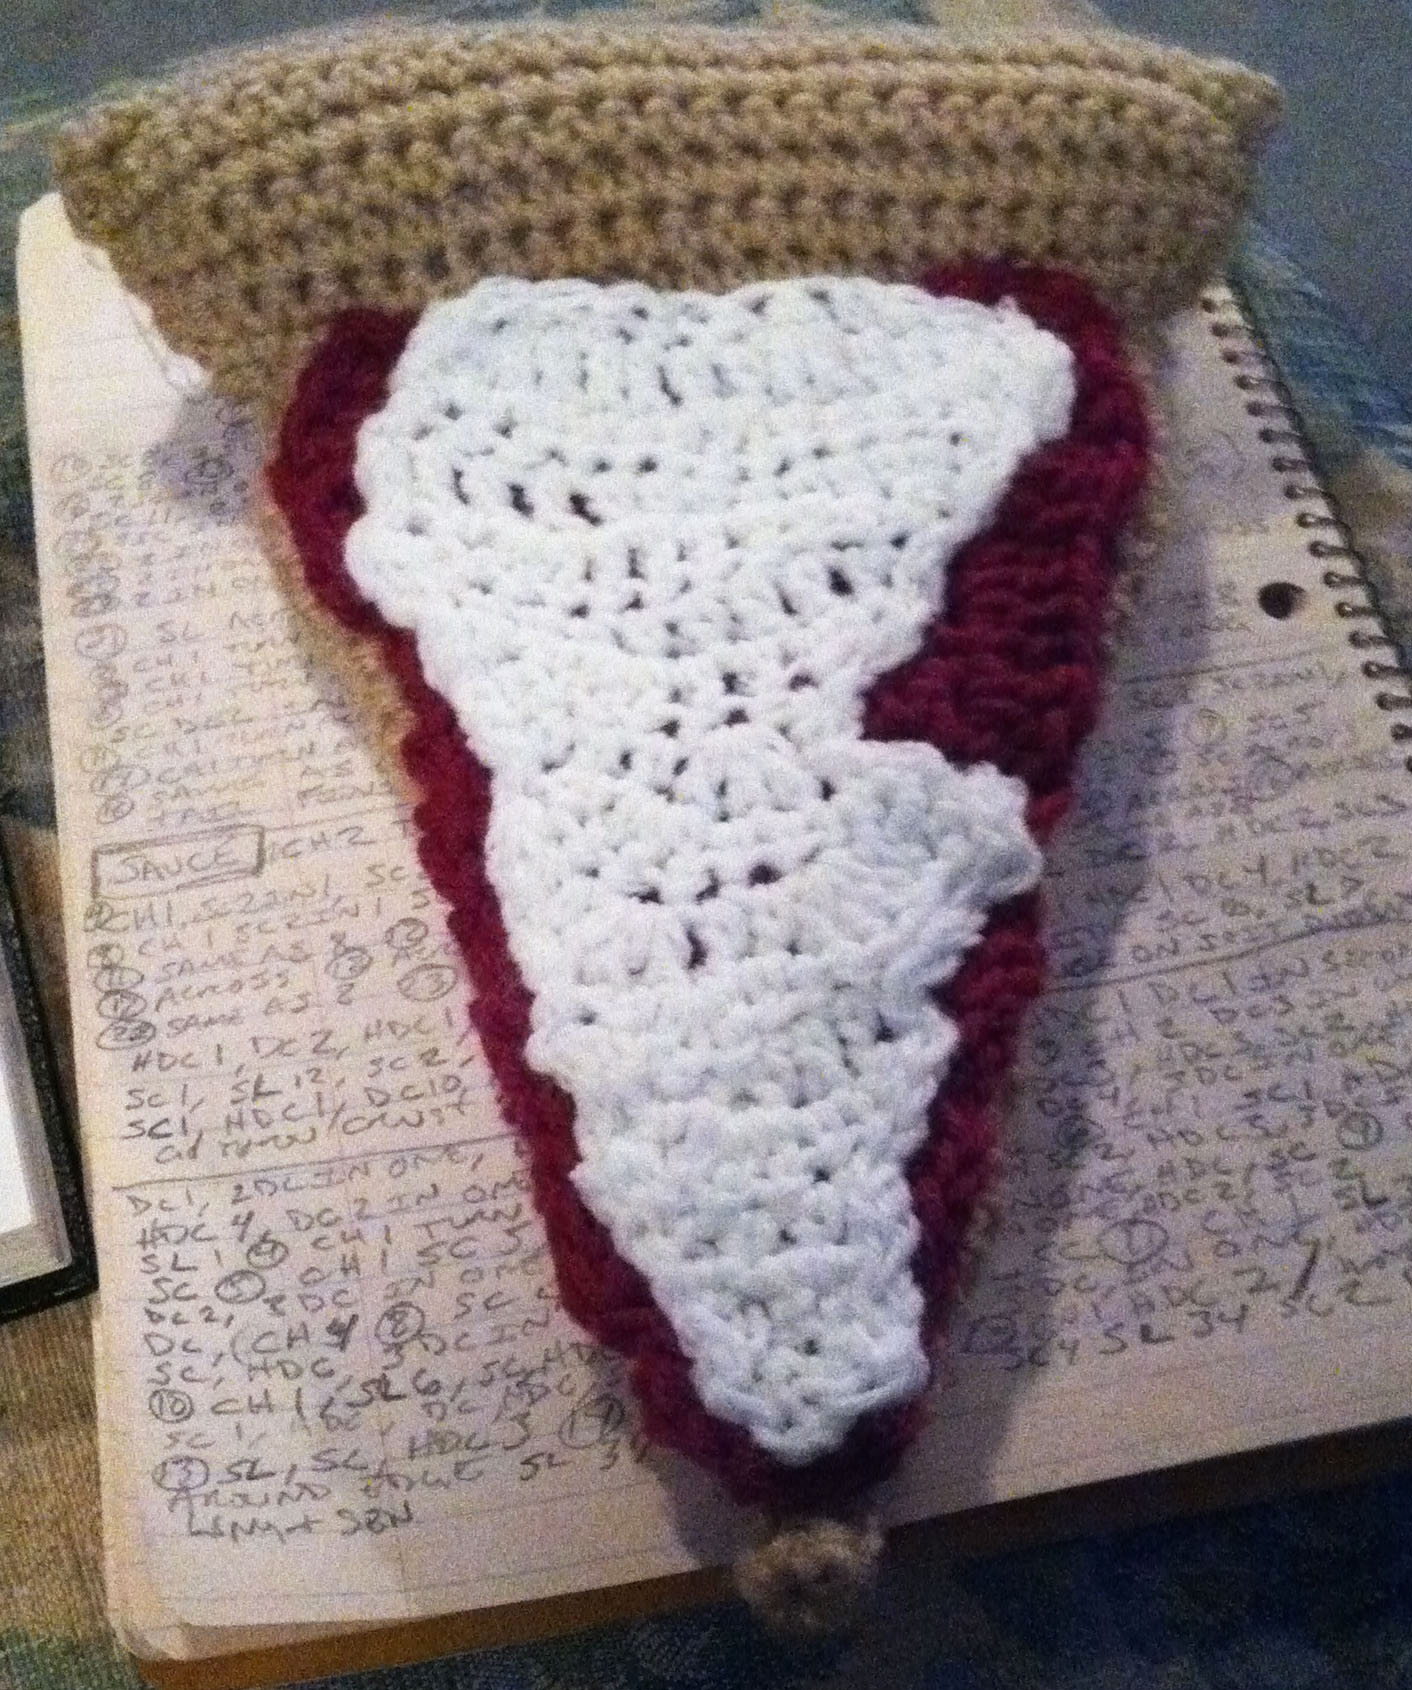 CHEESE
You start at smallest point and work up, creating a wiggly shape. Make sure of your gauge, this piece should fit within the top area of your sauce layer.
Row 1: CH 10, turn, HDC 1 in second CH from turn, DC 2, 2 DC in one CH, HDC 2, 2 DC in one CH, HDC 3, CH 2 for turning. – 12STs
R2: DC 3 in one ST, HDC 4, DC 2 in one ST, HDC 3, DC 3, CH 2 for turning. – 15STs
R3: DC 3, HDC 3, SC 2, HDC 3, SL 1, CH 1 for turning. – 12STs (ends before row below ends)
R4: SCDEC in first 2 STs, HDC 2, DC 4, DC 3 in one ST, HDC 1, SC 1, CH 1 for turning. – 12STs
R5: SC 6, HDC 2, DC 2, HDC 1, SC 1, CH 1 for turning. – 12STs
R6: SC 1, HDC 1, DC 2, DC 3 in one ST, HDC 1, SC 1, SL 1, CH 1 for turning. – 10 STs (ends before row below ends)
R7: SC 2, HDC 3, DC 3 in one ST, DC 1 CH 4 for turning. – 9STs (ends before row below ends)
R8: SC 3 on CH, HDC 2, DC 3 in one ST, HDC 1, SC 1, CH 1 for turning. – 10STs (ends before row below ends)
R9: SC 1, HDC 1, DC 3 in one ST, HSC 2, DC 3 in one ST, HDC 2, SC 2, CH 1 for turning. – 14STs
R10: SL 6, SC 1, HDC 1, DC 3 in one ST, HDC 1, SC 1, CH 1 for turning. – 13STs (ends before row below ends)
R11: SL 3, SC 1, HDC, DC 1, HDC 1, SC 1, CH 1 for turning. – 8STs (ends before row below ends)
R12: SC 1, HDC 1, DC 3 in one ST, HDC 1, SC 1. – 7STs (ends before row below ends)
R13: SL 1, SC 1, HDC 3, CH 2 for turning. – 5STs (ends before row below ends)
R14: DC 3, CH 1 for turning. – 3STs (ends before row below ends)
R15: HDC 2 , now work around edges as best as you can that makes sense with your gauge to fit over the sauce layer, SL 37, SC 3, HDC 3, SC 4, SL 34, SC 2, end with SL. – 85STs
Cut with really long tail so you can now sew this piece using it’s tail to the sauce in the appropriate place.
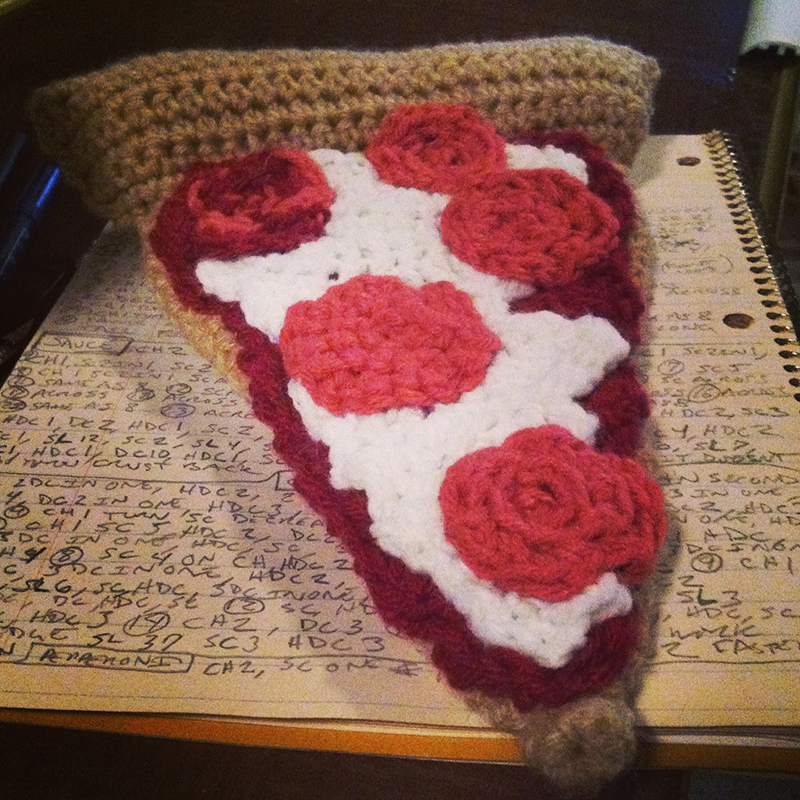 PEPPERONI
Make as many as these as you deem appropriate.
Work in Rounds, do not turn.
Round 1: CH 2, turn, SC 4 in second CH.
R2 – whatever makes sense: Just work around using SC until you think your pepperoni fits the proper size of your pizza.
SL to fasten, Cut with long tail so you can now sew this piece using it’s tail to the cheese in a place that makes sense.
Try different sizes and sporadic placement so your pizza looks more realistic.
Note: I made my pepperoni using two different red yarns. You CH them together, then as you SC you hide the unused color in your STs and then you can pick up the unused and hide the original color, it’s really simple, but you have to leave both tails long and sew both in, a bit more work, but it makes for a faceted color that looks better for meat chunky pepperoni.
hi. i am confused on the bottom crust where it says to slip stitch to close the opening. do i go around with a slip st? please let me know how to go ahead. i just feel like im doing it wrong thanks.