Free Palestine!

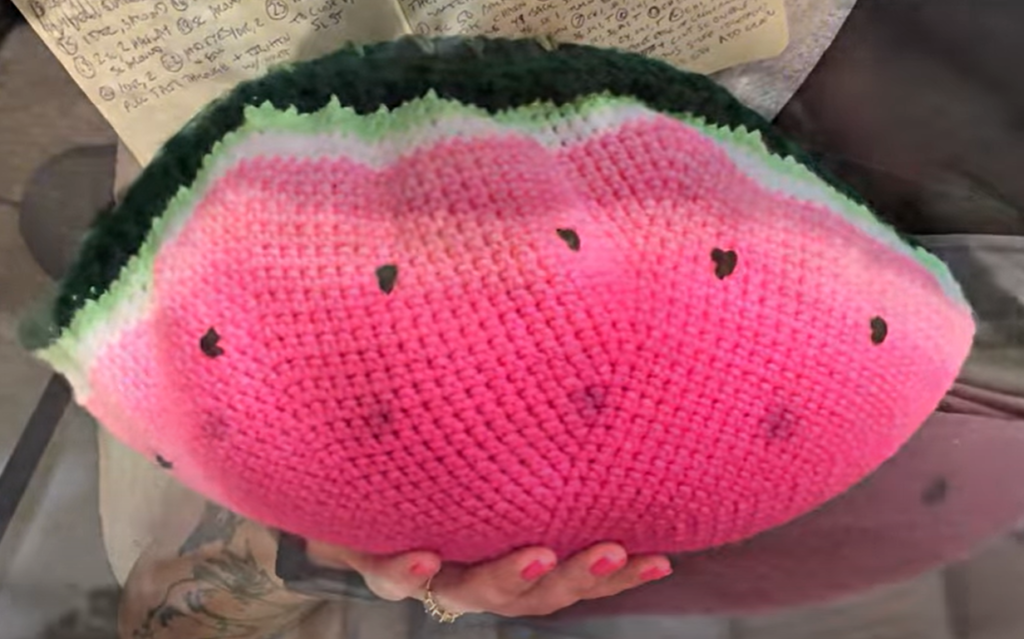
I should rework this pattern though, my stitches for the rind green part didn’t quite match up so I have some wrinkles that aren’t very “lifelike” to a real watermelon that is cut this way 🙂
I used a G/6 -4.25mm crochet hook
Work in rounds to start for the pink fruit part of the watermelon.
- In Pink (or whatever color for your fruit part), Magic circle, 6 sc around
- 2 sc in each 6 sc from the previous round, around (increasing the width of our flat base)
- 2 sc in one sc, 1 sc, around
- 2 sc in one sc, 2 sc, around
- 2 sc in one sc, 3 sc, around
- 2 sc in one sc, 4 sc, around
- 2 sc in one sc, 5 sc, around
- 2 sc in one sc, 6 sc, around
- 2 sc in one sc, 7 sc, around
- 2 sc in one sc, 8 sc, around
- 2 sc in one sc, 9 sc, around
- 2 sc in one sc, 10 sc, around
- 2 sc in one sc, 11 sc, around
- 2 sc in one sc, 12 sc, around
- 2 sc in one sc, 13 sc, around
- 2 sc in one sc, 14 sc, around
- 2 sc in one sc, 15 sc, around
- 2 sc in one sc, 16 sc, around
- 2 sc in one sc, 17 sc, around
- 2 sc in one sc, 18 sc, around
- 2 sc in one sc, 19 sc, around
- 2 sc in one sc, 20 sc, around
- 2 sc in one sc, 21 sc, around
- 2 sc in one sc, 22 sc, around
- 2 sc in one sc, 23 sc, around
- 2 sc in one sc, 24 sc, around
- 2 sc in one sc, 25 sc, around
- 2 sc in one sc, 26 sc, around; I fastened off my pink fruit color here and switched to white for the next two rounds
- In white, 2 sc in one sc, 27 sc, around
- In white, 2 sc in one sc, 28 sc, around; I fastened off the white here and switched to light green for the next two rounds
- In light green, 2 sc in one sc, 29 sc, around
- In light green, 2 sc in one sc, 30 sc, around; I fastened off the light green here and went in with black and a blunt yarn needle to sew some seeds into the pink fruit part. (I’m thinking if you are trying to make a different fruit like a lemon or orange wedge you’d put the white lines towards the center to show the sections of the citrus fruit here, I may try that next time to work out how to correct the rind/peel of this pattern)
- In dark green, 2 sc in one sc, 31 sc, around; I do just one round of the darkest rind color in the round and now I will stop working in rounds and move to a chain and rows along one side of it, I didn’t fasten off, I work the next chain from a sl of the last dark green sc and first dark green sc in this round.
CH 51 from the sl fasten of round 33; I chained as much as I thought the diameter of my rounds were, but this I think needs to actually be the circumference of the rounds so that I don’t get puckering when I sew these two parts together.
- 50 sc back to the base starting point of the chain you’ve created off the rounds, sl to the base round sc next to the chain
- 50 sc back to the free edge of the chain, ch 1, turn
- Work same side, back and forth now, skip 1 at the start and end of each row, so this row is: sk 1, 48 sc, sk 1, turn
- 1 ch, sk 1, 46 sc, sk 1, turn
- 1 ch, sk 1, 44 sc, sk 1, turn
- 1 ch, sk 1, 42 sc, sk 1, turn
- 1 ch, sk 1, 40 sc, sk 1, turn
- 1 ch, sk 1, 38 sc, sk 1, turn
- 1 ch, sk 1, 36 sc, sk 1, turn
- 1 ch, sk 1, 34 sc, sk 1, turn
- 1 ch, sk 1, 32 sc, sk 1, turn
- 1 ch, sk 1, 30 sc, sk 1, turn
- 1 ch, sk 1, 28 sc, sk 1, turn
- 1 ch, sk 1, 26 sc, sk 1, turn
- 1 ch, sk 1, 24 sc, sk 1, turn
- 1 ch, sk 1, 22 sc, sk 1, turn
- 1 ch, sk 1, 20 sc, sk 1, turn
- 1 ch, sk 1, 18 sc; depending on how big your piece is this may be a different row with a different number of stitches but that’s okay just make sure this is a row stitching towards the free edge, because after the 18th stitch, continue with sc around free edge to the other side of your chain and then repeat rows 2 – 17 (or to whatever row you got to so the piece is the same width on both sides of your chain, and make sure that row’s stitches end at the fruit base where the chain is attached) along the other side so you have like a big green leaf/football shaped thing. Fasten off with a long tail because the tail is what you’ll use to sew this rind piece onto the fruit piece!
Optionally, I wanted the rind to have some green stripey streaks on it like a real watermelon rind, so I went in with a gradient green yarn I had with a blunted needle and sewed some onto the rind.
Then once I was satisfied with that, I picked up the long dark green tail I left and then sewed the fruit piece (round 33) to the outside of my rind leaf/football shape and when I got near to the end, I stuffed it full with polyfill stuffing. Also, I use any scrap fabric I have lying around and even the leftovers of yarn that are too small to crochet with. You can basically stuff anything you want in your pieces, so long as they are safe to wash in a machine and dryer because you never know what customers or friends might do and I always like things that can be washed!

